
Introduction
Nothing truly encapsulates the fun and nostalgia of camping like a sweet, melty treat made right over the fire, which is exactly what the Reese’s Campfire Cones Recipe provides for your outdoor experiences. This delectable dessert blends the crispness of waffle cones with the gooey, chocolatey enchantment of micro marshmallows, Reese’s micro Peanut Butter Cups, chocolate chips, and Reese’s Pieces to create an easy-to-make indulgence ideal for outdoor events. Whether you roast these cones by the campfire or bake them in your home oven, you’re in for a nostalgic and delicious experience that will undoubtedly become a favorite tradition.
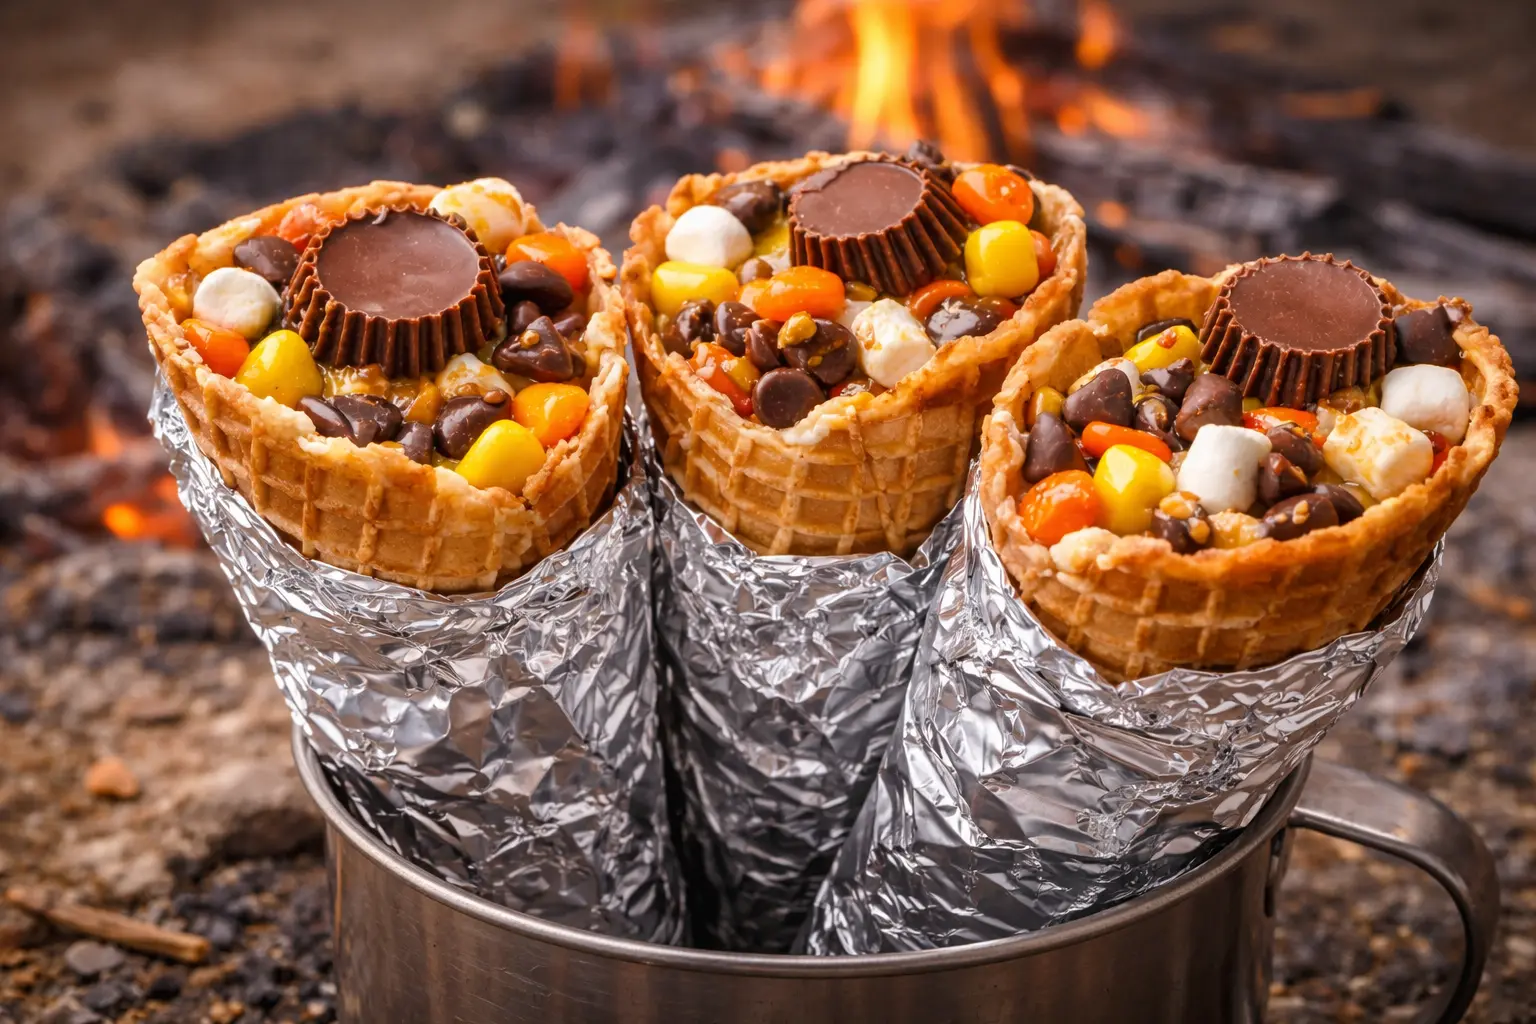
Ingredients You Will Need
The Reese’s Campfire Cones Recipe’s enchantment comes from its basic, carefully chosen ingredients. Each piece contributes significantly to the texture and flavor symphony, from the crispiness of the waffle cone to the creamy peanut butter chocolate treasure inside.
Waffle cones: These serve as the ideal culinary container, providing crunch and structure to house all of the delectable ingredients.
Mini marshmallows: The fluffy texture melts down well, resulting in an irresistibly gooey, sweet coating.
Chocolate chips: Add bursts of smooth, melted chocolate that wonderfully complement the peanut butter.
Reese’s Mini Peanut Butter Cups are the star ingredient, with creamy peanut butter encased in milk chocolate for a trademark flavor.
Reese’s Pieces: Tiny bursts of crunch and color that brighten up every meal with peanut butter flavor.
How to Prepare Reese’s Campfire Cones Recipe
Step 1: Begin with a marshmallow base
Start by filling the bottom quarter to one-third of the waffle cone with tiny marshmallows. This base layer keeps every bite gooey and sweet while also acting as a cushion for the layers above, preventing your cone from collapsing.
Step 2: Layer the Chocolate and Peanut Butter Goodies
Next, gently layer chocolate chips, then sprinkle with Reese’s Mini Peanut Butter Cups, followed by Reese’s Pieces. Add another handful of mini marshmallows on top, gently pressing each layer down just enough to keep everything inside the cone without squishing out. This layering technique achieves the ideal blend of creamy, crunchy, and melty textures.
Step 3: Wrap it tightly in aluminum foil
Wrap each filled cone tightly in aluminum foil to avoid melting incidents. Cover the top of the cone first to prevent the ingredients from pouring out, then fold the bottom and sides nicely. This wrapping technique will safeguard your wonderful creation when baking or over an open flame.
Step 4: Select your cooking method
If you’re indoors or prefer to use the oven, preheat it to 350°F. Place the foil-wrapped cones on a baking sheet and bake for 10 to 15 minutes, until the chocolate and marshmallows are completely melted and gooey.
Step 5: Cook over a fire or grill
To create an authentic campfire atmosphere, set your wrapped cones directly on hot embers or grill grates. Turn them every few minutes for 5 to 7 minutes. This gives the cone a delicate toasted flavor, while the interior melts evenly, resulting in a warm, lovely dessert.
Step 6: Cool and enjoy
Once cooked, carefully take the cones from the flame and allow to cool for a minute or two – they will be hot! Then, gently unfold the foil and indulge in the creamy, melty wonder of your Reese’s Campfire Cones Recipe.
How to Serve Reese’s Campfire Cones Recipe with Garnishes
If you wish to add some flair, after unwrapped, sprinkle crushed peanuts or a splash of sea salt on top. This provides a wonderful crisp contrast and brings out the peanut butter flavor beautifully. A drizzle of caramel or a sprinkle of powdered sugar can enhance the experience even further.
Side Dishes
These cones are delicious on their own as a dessert, but mixing them with fresh fruit like strawberries or bananas provides a refreshing contrast to the richness. For a complete camping feast, serve with s’mores or a cup of creamy hot chocolate to maintain the comfortable atmosphere.
Creative ways to present
Serve the cones upright in a small flower pot filled with dry rice or beans to keep them stable. For a creative variation, make cones with different Reese’s candies or mix in nuts to adjust the sweetness and crunch to your preference. Presenting these in colorful foil gives a festive touch to outdoor celebrations and family gatherings.
Make Ahead and Storage
Storing leftovers
If you have any cones left over (though it’s difficult to imagine!), keep them wrapped firmly in foil or in an airtight container at room temperature for up to a day. Keep in mind that the texture is best savored fresh, since the waffle cones tend to soften with time.
Freezing
Wrap the cones tightly and freeze them before cooking to extend their shelf life. When you’re ready, unwrap and cook them straight from the freezer, adding a few minutes to ensure they’re completely melted and ideally warmed.
Reheating
Reheat the covered cones in a 350°F oven for 5 to 7 minutes, or until warm and gooey again. Avoid microwaving because it can leave the cones sloppy and unevenly cooked, and part of the appeal is the crunchy cone outside!
FAQs
Can I use ordinary cones rather than waffle cones?
Waffle cones provide the most crunch and sturdiness for this recipe, although sugar cones would still suffice. To avoid breaking during filling and frying, treat them gently.
Is it feasible to make these cones Vegan?
Absolutely! Use vegan waffle cones, dairy-free chocolate chips, and vegan marshmallows, as well as vegan peanut butter cups and candy-coated chocolates. The results are equally delightful and inclusive.
Can I prepare these cones ahead of time for my camping trip?
Yes! At home, assemble and wrap them firmly in foil before storing in a fridge or freezing until ready to cook over the campfire, making your camping dessert simple and mess-free.
What is the best approach to ensure that marshmallows melt evenly?
Layering small marshmallows at the bottom and throughout the cone promotes even melting. Cooking time and a careful turn over the fire or grill ensure gooey deliciousness without burning.
Can I modify the fillings?
Definitely! While the basic Reese’s Campfire Cones Recipe is popular, you may customize it by adding nuts, various candies, or even a swirl of peanut butter within. The options are limitless and enjoyable to experiment with!
Final Thoughts
If you’re looking for a quick, fun, and delicious treat that will bring everyone together, I highly recommend trying the Reese’s Campfire Cones Recipe. It’s the ideal combination of nostalgic flavors and simple preparation that transforms every gathering into a pleasant, laughter-filled celebration. Once you’ve tried them, I’m sure these gooey chocolate-peanut butter treats will become a regular at your next outdoor trip or warm kitchen night.