
Alright, let’s whip up some delicious cream brioche muffins using your Thermomix! First, grab a large bowl and combine your bread flour, dried instant yeast, and a pinch of salt. Then, toss in some melted butter, an egg, and a splash of whole milk. Mix it all up until you’ve got a nice, sticky dough. Let that rise in a warm spot until it’s doubled in size. Trust me, it’s gonna be fluffy!
Once it’s ready, divide the dough into brioche buns and shape them into cute little rolls. Place them on a baking tray or in a muffin tin and let them rise again. Brush those babies with an egg wash for that shiny crust. Now, while they’re baking, melt some chocolate and mix it into your brioche for a sweet twist. Bake until they’re golden and sound hollow when tapped. You’ll love this recipe!
These brioche rolls are so easy to make, You’ll feel like a pro baker in no time! Just imagine pulling out a tray of warm, buttery brioche buns from the oven, and the smell filling your kitchen like your fave bakery. If you’re feeling adventurous, try adding some chocolate chips for that chocolate brioche vibe. Store any leftovers in the fridge—if there are any left! Enjoy your homemade treats!
Introduction to Brioche Muffins
Hey there, muffin lovers! Let’s dive into the world of brioche muffins, shall we? They’re like a fluffy loaf and a sweet bun had a delicious baby! If you’ve got a Thermomix brioche recipe in your cookbook, you’re already halfway there. Just mix up that pastry goodness and let it hang out in a warm spot until doubled in size. Trust me, these brioche buns are best fresh out of the oven, so grab your pan and let’s get cooking!
Once you’ve got that dough rising, pop it in the fridge if you need to slow things down. A little patience goes a long way, especially when you’re channeling your inner chef! Just keep an eye on it; it should double in size, and then you’ll be ready to bake up some heavenly treats. So, roll up your sleeves and let’s tackle this bread making adventure together!
What Makes Brioche Muffins Special?
Brioche muffins are like the fancy cousins of regular muffins, right? They’re super soft and fluffy, thanks to that rich, buttery dough. You bite in and it’s like a little cloud of happiness! Plus, they’re often a bit sweeter, which makes them perfect for breakfast or brunch. You can throw in chocolate chips, fruits, or even nuts to mix things up. Honestly, once you try them, you might never go back to regular muffins!
Why Use a Thermomix for This Recipe?
If you’re thinking about whipping up this recipe, using a Thermomix is a total game-changer! Seriously, it’s like having a sous-chef that does all the heavy lifting for you. You can chop, blend, and cook all in one nifty machine, which means less mess and fewer dishes to wash later. Plus, it’s super easy to follow along with the guided cooking feature, so even if you’re not a pro, you’ll nail it every time.
And don’t even get me started on how quickly it can whip up your ingredients! With a Thermomix, you’ll save time and still impress everyone with your culinary skills. Trust me, once you try it, you’ll wonder how you ever cooked without it!
What Ingredients Do You Need?
Alright, so you wanna whip up something tasty, huh? First off, you gotta grab some flour, ’cause that’s the base for pretty much everything. Don’t forget sugar to sweeten the deal! Then, you’ll need some eggs to bind it all together. If you’re feeling fancy, toss in a bit of vanilla extract for that extra oomph! Lastly, a pinch of salt never hurt anyone, right? Now you’re all set to get cooking!
Preparing the Dough
So, you’ve whipped up a batch of those delicious brioche muffins, and now you’re staring at a mountain of fluffy goodness wondering what to do with all of them. You might be wondering, “Can I just toss these in the freezer and save them for later?” Well, the answer is a resounding yes! Freezing brioche muffins is not only possible, but it’s actually a smart move if you want to enjoy that sweet, buttery flavor down the line without having to bake a new batch every time you crave one. You know those moments when a sudden muffin craving hits? Just grab one from the freezer, and boom—you’re living your best muffin life in no time!
Now, let’s talk about how to freeze these little bites of heaven properly. First things first, let those muffins cool down completely after baking. If you try to freeze them while they’re still warm, you’ll end up with a soggy mess, and no one wants that. Once they’re cool, wrap each muffin tightly in plastic wrap or aluminum foil. This step is super important because it keeps the air out and prevents freezer burn. If you want to take it a step further, toss those wrapped muffins into a freezer bag. This way, you can store a bunch together without worrying about them getting freezer-flavored. Just make sure to squeeze out as much air as possible before sealing the bag!

When you’re ready to enjoy your frozen brioche muffins, the process is just as easy. You can either pop them in the microwave for a quick warm-up or let them thaw overnight in the fridge. If you’re feeling fancy, you could even reheat them in the oven for a few minutes to get that fresh-baked taste back. Just remember, the key is to not overdo it; you want that muffin to be warm and soft, not a chewy disaster. And voilà! Your once-frozen muffins are now back to being the delightful treats they were meant to be.
Freezing brioche muffins is an awesome way to make sure you always have a tasty snack on hand. Plus, it saves you time on those busy mornings when you barely have a second to grab breakfast. So go ahead, bake a bunch, freeze ’em, and you’ll never have to go without your favorite muffins again!
How Do You Start Making Brioche Dough?
So, first things first, to start making brioche dough, you gotta get your ingredients together. You’ll need some flour, sugar, eggs, milk, yeast, and a good chunk of butter. Now, mix your dry stuff—flour, sugar, and yeast—then add the wet ingredients like eggs and milk.
Once that’s all combined, it’s time to work in that butter. Seriously, it’s what makes brioche so rich and delicious! Knead it until the dough is smooth and elastic.
Then, let it rise until it doubles in size—patience is key here! After that, you’re on your way to baking some super fluffy brioche. Enjoy the process!
What Techniques Should You Use for the Best Results?
So, if you wanna get the best results, you gotta mix it up a bit! First off, try using visual aids like charts or graphs—those really help make things clear, you know? Then, don’t forget about practice; the more you do it, the better you get. And hey, don’t be shy to ask for feedback from others. It’s gold! Just keep experimenting with different techniques until you find what really clicks for you.
How Long Should You Knead the Dough in the Thermomix?
So, you’ve got your dough ready in the Thermomix, huh? Well, kneading time is super important! You generally want to give it about 2 to 3 minutes on the kneading setting. That’s usually enough to get that perfect texture.
But hey, if you’re feeling adventurous, check the dough around the 2-minute mark. If it looks too sticky, just add a bit of flour before you keep going.
Trust me, after a few rounds, you’ll have that dough kneaded like a pro!
Shaping and Filling the Muffins
So, when you’re shaping those muffins, you wanna make sure they’re all cute and uniform, right? Grab that batter and scoop it into your favorite muffin tin. It’s all about that perfect fill—not too much, not too little, just enough to give them that nice dome shape when they rise. And hey, if you’re feeling adventurous, throw in some chocolate chips or blueberries for that extra yum! Just remember to keep it fun and easy!
What is the Best Way to Shape Brioche Muffins?
So, if you wanna get your brioche muffins looking all fancy and perfect, you gotta nail that shaping process. Start by grabbing your dough and gently punching it down to release the air. Then, divide it into equal pieces—like, don’t stress too much about perfection, just eyeball it.
Next, take each piece and roll it into a cute little ball. Tuck the edges under to create a smooth top. Place them in your muffin tin, and let them rise again. Trust me, that second rise is key for those deliciously fluffy brioche muffins!
How Can You Add Fillings to Make Them Creamy?
Wanna make your dishes super creamy? Start by adding some cream cheese or sour cream to the mix. They blend in so well and give that smooth texture we all love. You can also toss in some mashed avocado for a healthy twist that’s totally delish! Don’t forget about butter—a little bit goes a long way in making everything richer. Just experiment and find what makes your taste buds sing!
What Tips Can Help You Create Perfect Muffin Shapes?
Alright, if you wanna whip up some perfect muffin shapes, start by using the right muffin tin. Non-stick pans are your best buddies! Next, don’t skimp on the batter filling; filling them about two-thirds full gives you that awesome dome shape. Oh, and remember to preheat your oven! A hot oven helps the muffins rise beautifully. Finally, let them cool in the pan for a bit before transferring them to a rack, so they keep that lovely shape!
Baking Your Muffins
If you’re on a mission to create those perfect, picture-perfect muffin shapes, you’re in for a treat because it’s all about the little things! First off, grab yourself some good quality muffin tins. Seriously, if you’re using those flimsy, old pans, you’re setting yourself up for muffin mayhem. Opt for heavy-duty, non-stick pans that will give you that nice, even heat distribution. Trust me, your muffins will thank you for it! And don’t forget to line those pans with paper liners or grease them well—no one wants a muffin stuck to the bottom like a bad breakup.
Now, let’s talk about your batter consistency. You want it to be just right—not too thin or too thick. A good rule of thumb is to use a scoop or a measuring cup for pouring. This way, you’ll get an even amount of batter in each cup, which is key for keeping those muffin shapes uniform. Oh, and here’s a pro tip: fill each liner about two-thirds full. If you overfill, you might end up with muffin tops that look like they’ve been through a wild party, and not in a good way!
Speaking of muffin tops, don’t be afraid to get creative with your toppings. Whether it’s a sprinkle of granola, a dollop of crumble, or a drizzle of icing, adding a little something extra can help enhance that muffin shape and make them look super inviting. It’s all about that finishing touch! And remember to rotate your muffin tin halfway through baking. This little move can help you achieve that golden-brown color all around.
Finally, let your muffins cool in the pan for a few minutes before transferring them to a wire rack. This helps them set up nicely and keeps those lovely shapes intact. Follow these tips, and you’ll be the proud owner of the best-looking muffins on the block! Happy baking!
What Temperature Should You Set Your Oven To?
So, when you’re wondering what temperature to set your oven to, it really depends on what you’re cooking. For a classic roast, crank it up to around 400°F. But if you’re baking something delicate like cookies, you might want to keep it at 350°F. Just remember, every oven’s a little different, so don’t be afraid to experiment a bit!
And hey, if you’re using a recipe, definitely follow its temp guidelines. They usually know what’s up! Just keep an eye on your food, and you’ll nail it every time.
How Long Should You Bake the Muffins?
So, you’re wondering how long to bake those muffins, huh? Well, it’s usually around 20 to 25 minutes at a good 350°F. Just keep an eye on them! You want that perfect golden-brown top. Stick a toothpick in the middle; if it comes out clean, they’re ready to rock! Don’t rush it, though—nothing worse than a soggy muffin. Just let them cool a bit before diving in. Happy baking!
How Can You Tell When They’re Done?
So, how can you tell when they’re done? It’s like a secret code, right? You gotta watch for those little signs. Maybe they start to zone out or give you that “I’m over this” look. Or, if they’re tapping their foot or checking their phone a million times, that’s a dead giveaway! Just pay attention to their vibe, and you’ll know when it’s time to wrap things up.
Serving and Storing Your Muffins
So, you’ve baked some killer muffins and now it’s time to serve them up! Grab a cute plate and maybe sprinkle a little powdered sugar on top for that fancy touch. If you’re not gobbling them all down right away, you gotta think about storing them. Pop them in an airtight container to keep them fresh, and don’t forget to put a paper towel inside to soak up any moisture. Trust me, they’ll thank you later!
What are the Best Ways to Serve Brioche Muffins?
So, when it comes to serving brioche muffins, you can’t go wrong with a classic twist! Try toasting them lightly for that perfect crunch, then slather on some butter or your fave jam for a sweet treat.
If you want to get fancy, whip up a quick cream cheese frosting to spread on top, or even some fresh fruit to make it all fancy-schmancy.
And hey, don’t forget a side of coffee or tea; it’s basically a match made in heaven!
How Can You Store Leftover Muffins?
So, you’ve got some leftover muffins sitting around, huh? No worries! First off, let them cool down completely. Then, toss them in an airtight container or a ziplock bag to keep them fresh. If you’re planning to save them for longer, just pop them in the freezer! When you’re ready to enjoy, just microwave them for a few seconds or let them thaw for a bit. Easy peasy, right?
Can You Freeze Brioche Muffins for Later Use?
If you’ve got a stash of brioche muffins and you’re wondering if you can freeze ’em for later, totally do it! Just pop those suckers in a freezer bag and seal ’em up tight. When you’re ready to munch, just let them thaw at room temp or give ’em a quick zap in the microwave. They’ll still taste super fresh and fluffy, like they just came out of the oven!
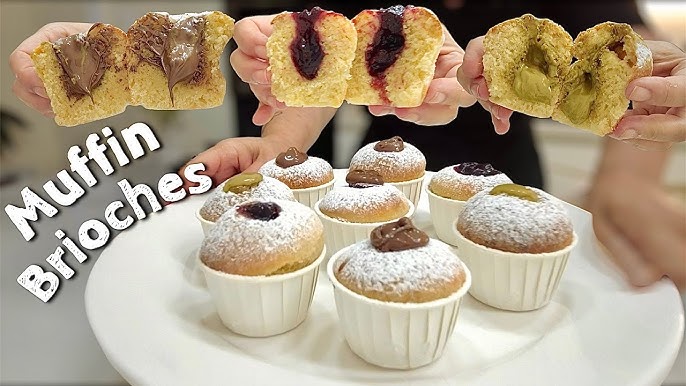
This recipe has been made by our friend Luz María Lagoa Vives. Hello comrades. First pastry Saint Friday of the month of April, faithful to it, with a new recipe.
This week, some brioche muffins with pastry cream. Super fluffy and delicious. I recommend them to you.
| Category | Thermomix Desserts |
| Cooking time | 30 minutes |
Ingredients
PASTRY
- 375 ml milk
- 80 grams sugar
- 40 grams cornstarch
- 2 yolks
- Vanilla
MASS
- 500 grams strong flour
- 12 grams fresh yeast
- 200 ml milk
- 60 grams sugar
- 40 grams honey
- 1 egg
- 80 ml sunflower oil
- Orange zest
- Pinch of salt
OTHERS
- beaten egg (for brushing)
- Sugar moistened with anise
Instructions
PASTRY
- All the ingredients in the glass, except for the vanilla,
- 6 minutes / 90°C / speed 4.
- Then, we add the vanilla,
- 10 seconds / speed 5.
- We put it aside in a bowl and cover it with skin film (in contact with the cream); for np generate scab. When it cools, we put it in the refrigerator.
MASS
- We sift the flour and salt,
- 10 seconds / speed 8.
- we set aside and reserve
- We dilute the yeast in the warm milk, stir.
- In the glass, add the egg, sugar, honey, zest, oil and milk with the yeast,
- 5 seconds / speed 4,
- then we add the reserved flour,
- 10 seconds / speed 4.
- Rest for 20 minutes so that the flour particles are hydrated.
- Then, we will do 3 kneadings of 2 minutes with a 5-minute rest between kneading and kneading.
- Remove to a lightly greased bowl and cover.
- We let it increase in size (about 2’30 to 3 hours, approximately)
- Then, we degas (remove the air created after rising), kneading for a minute by hand.
FORMED AND BAKED
- We weigh the dough and divide into 12 portions.
- We ball each portion, cover and let it rest for 15 minutes.
- Then, we cut each ball in half.
- With each half, we roll out with a rolling pin, we will make a rectangle of about 18/20 cm.
- In the middle and without reaching the edges, we place a lace of cream, close with the dough and pinch the joints so that the filling does not come out.
- Having made 2 cords, we link them together, and now we roll them up.
- We are depositing in the cupcake papers.
- When we have them all done, we cover and let it rest for 40 minutes.
- Then, we brush with the beaten egg and sprinkle with moistened sugar.
- Oven preheated to 170°C / heat up and down
- We bake for about 25 min.
- We turn off and remove to cool on a rack.
- ONLY LEFT TO ENJOY, GOOD PROFIT